
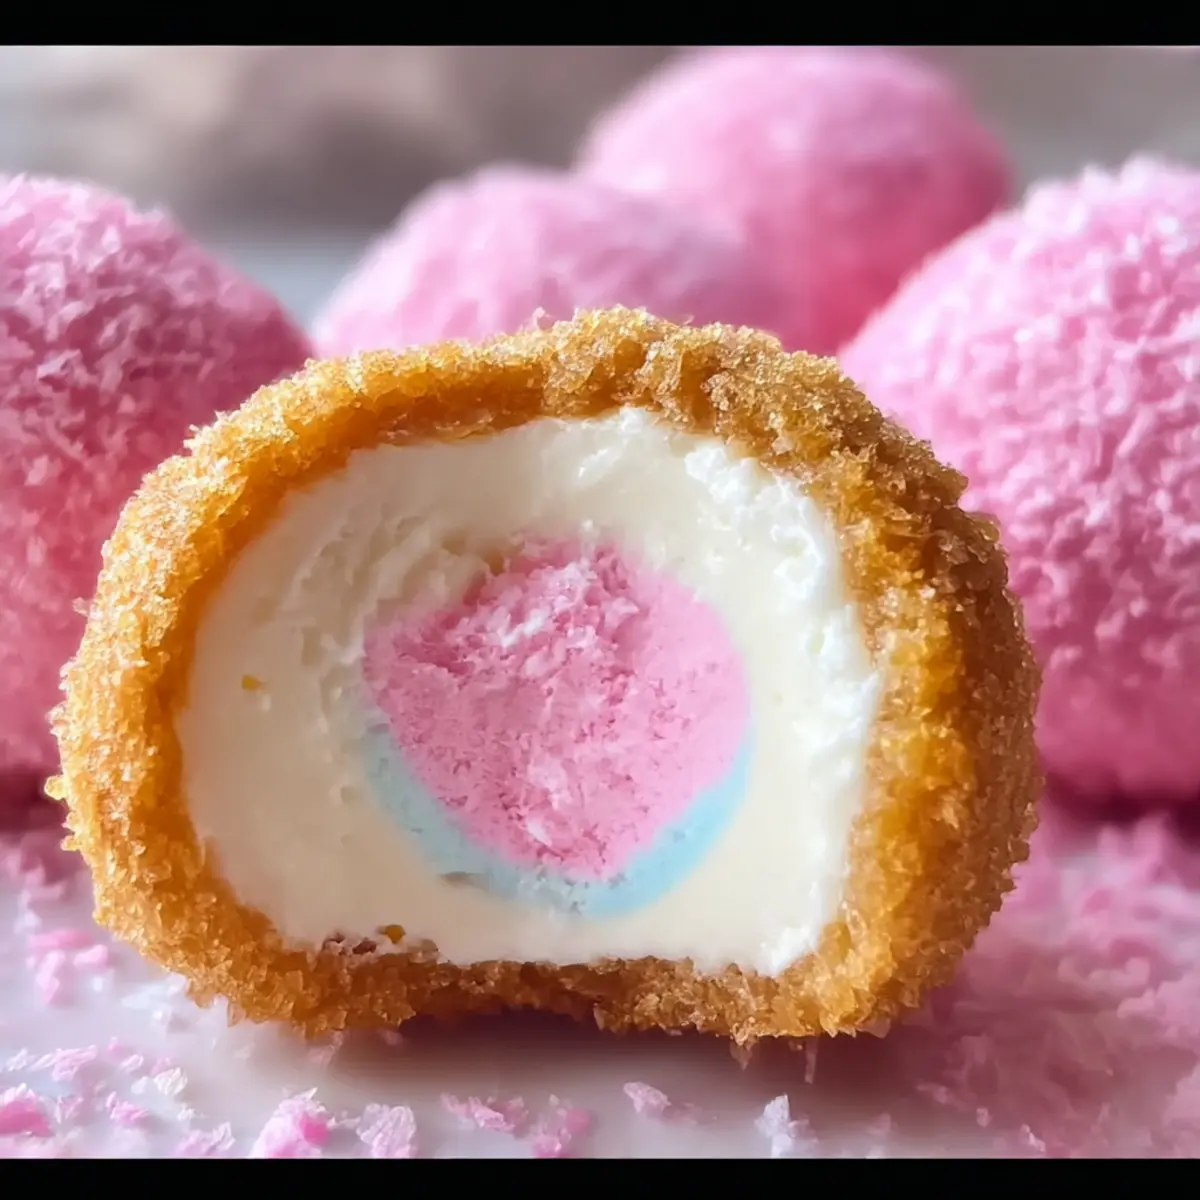
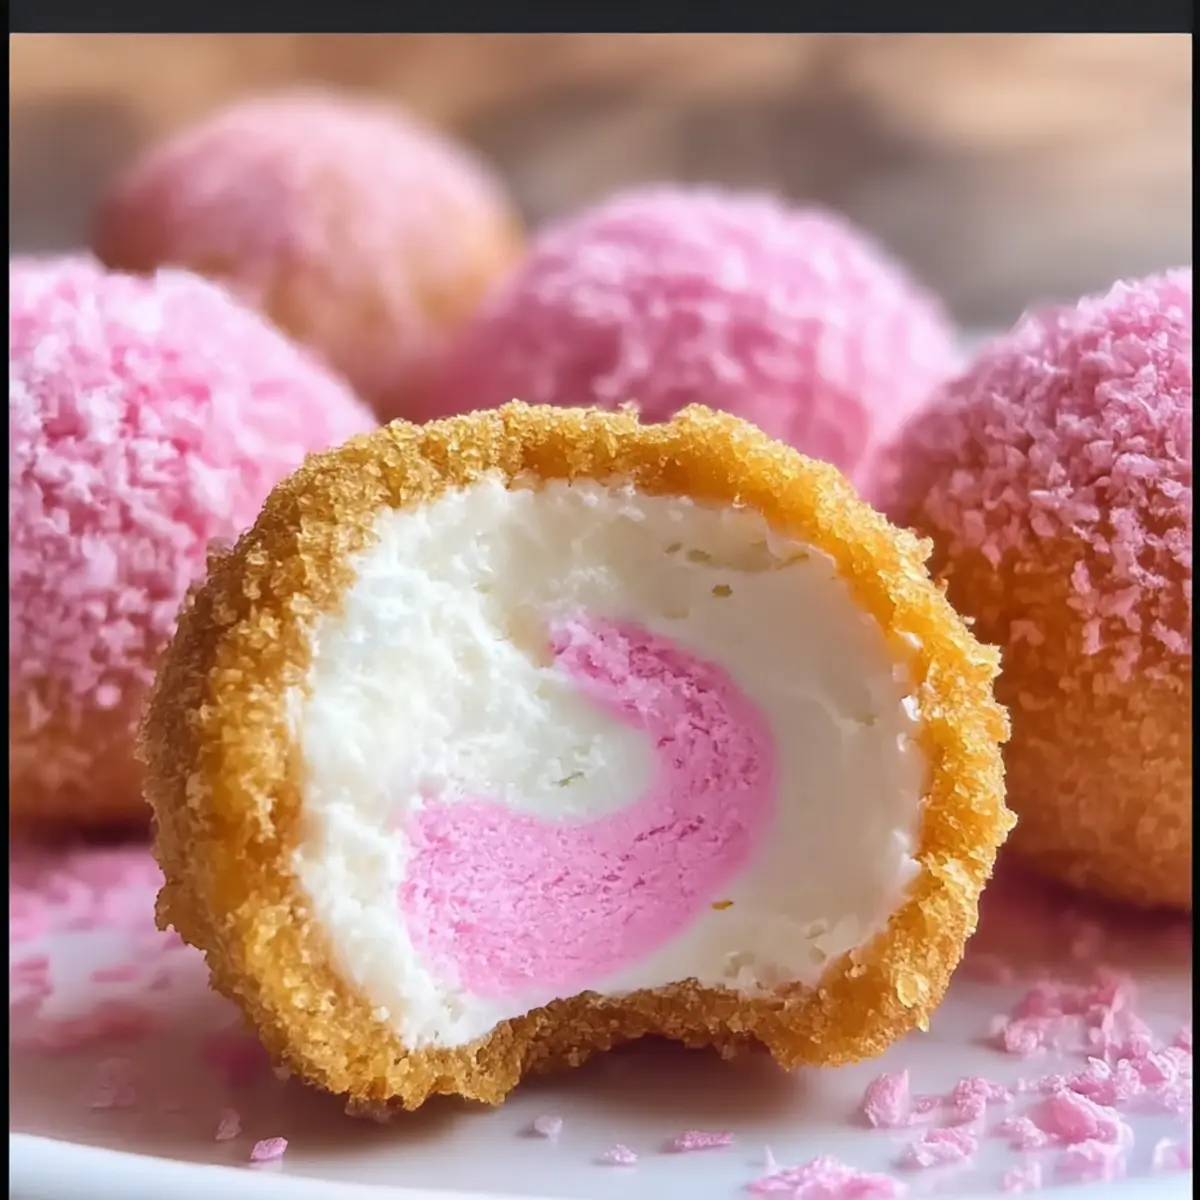
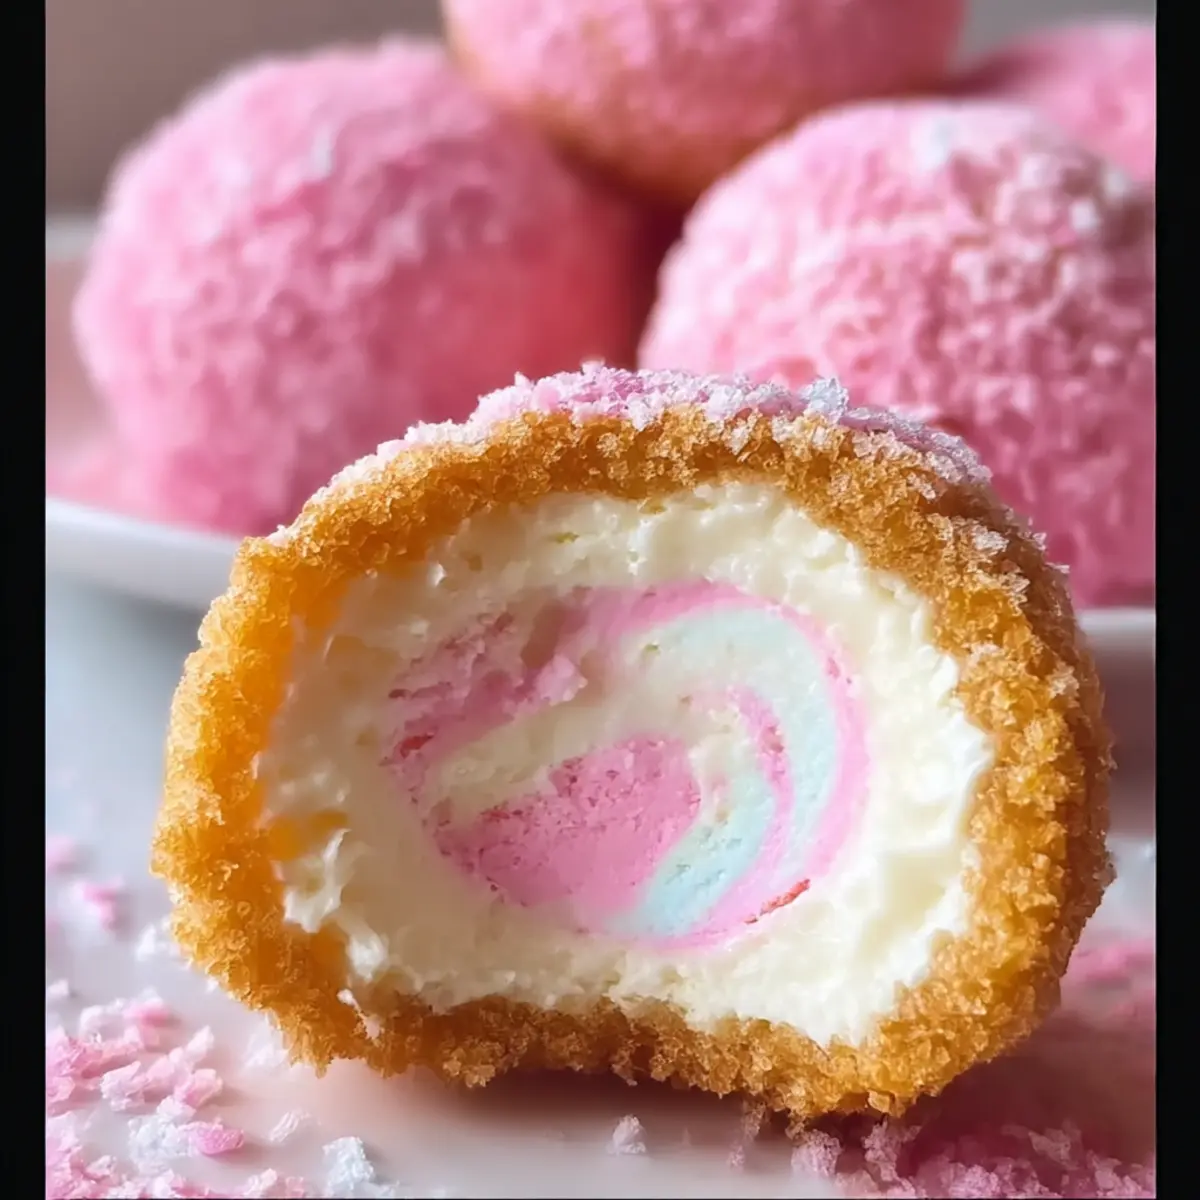
“Can you hear the carnival music in the distance? That sweet, nostalgic melody transports me back to sunlit days filled with laughter and sticky fingers. Today, I’m bringing that whimsical spirit right into your kitchen with my Crispy Cotton Candy Cheesecake Bombs. This delightful dessert marries the airy sweetness of cotton candy with the luscious creaminess of cheesecake, all enveloped in a golden, crispy shell. Not only are these bites a true showstopper at parties, but they also offer a comforting twist on classic flavors that everyone will adore. Whether you’re trying to impress guests or just treat yourself, these dreamy treats are bound to become a favorite in your dessert repertoire. Are you ready to discover this magical combination that’s as fun to make as it is to eat?”
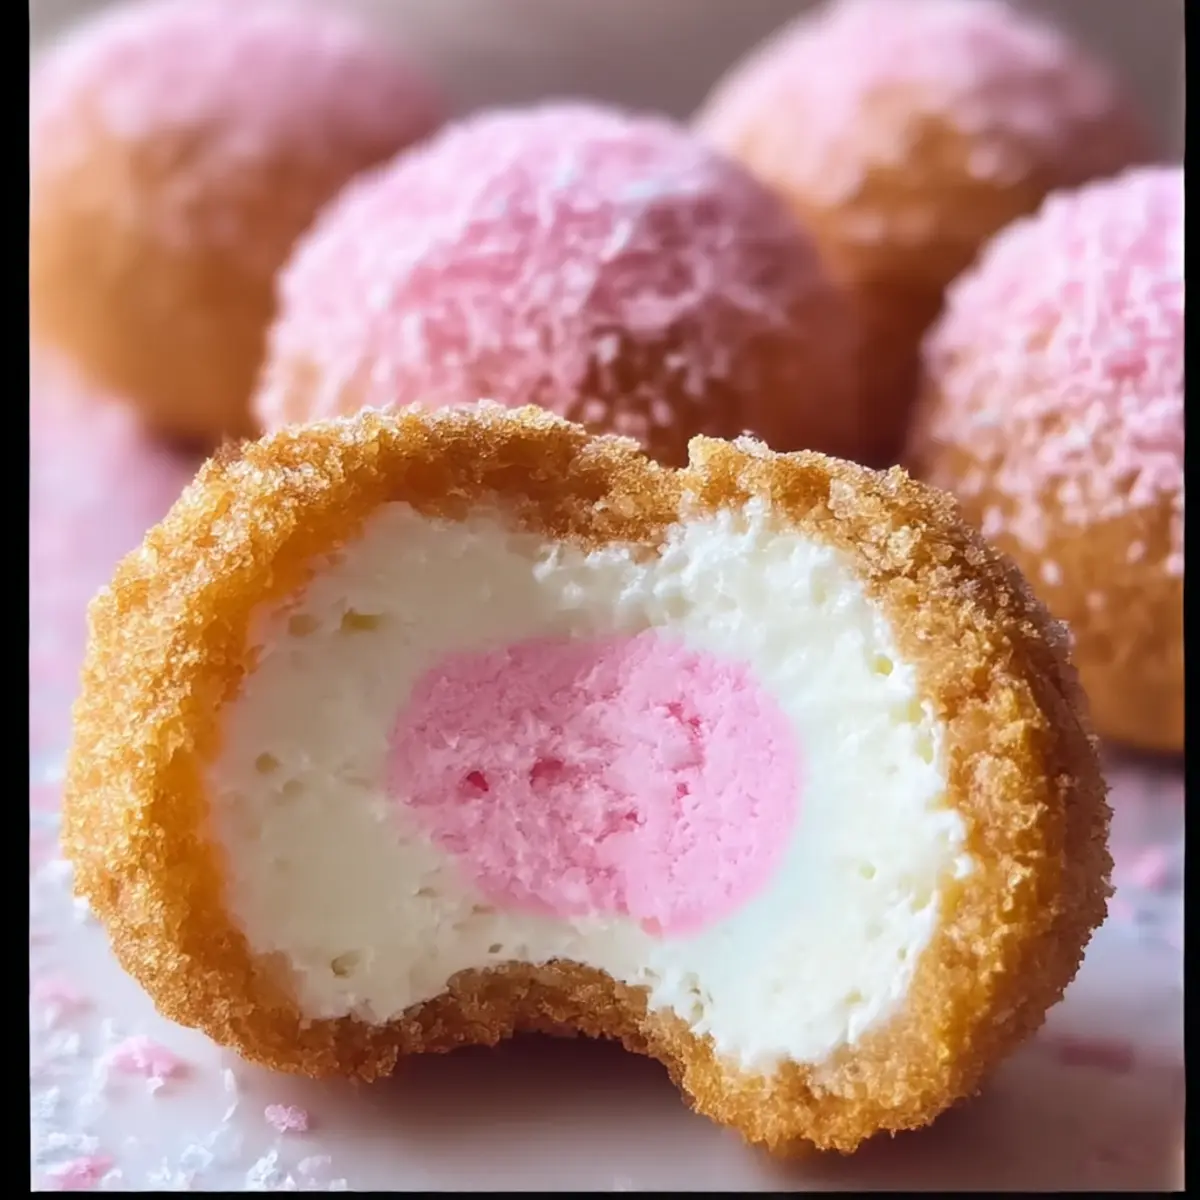
Why are these cheesecake bombs irresistible?
Whimsical in flavor and presentation, these Crispy Cotton Candy Cheesecake Bombs are a delightful twist on traditional desserts. Unique textures come alive with a warm, crispy shell cradling velvety cheesecake filling, making every bite a joy. Perfect for parties, they’re sure to impress guests and spark conversations. Versatile ingredients allow for delicious substitutions, whether you opt for a classic vanilla twist or a daring fruit flavor. Quick to prepare, these bites can be made ahead of time, ensuring you spend more moments enjoying the festivities and less in the kitchen. If you love all things sweet, be sure to check out my Pumpkin Cheesecake Truffles for another delightful treat!
Cotton Candy Cheesecake Bombs Ingredients
For the Creamy Filling
- Cream Cheese – 1 cup, softened for the smoothest blend.
- Powdered Sugar – 1/2 cup, adds sweetness and blends easily; granulated sugar works in a pinch.
- Vanilla Extract – 1 teaspoon, brings depth of flavor; opt for pure for the best results.
- Cotton Candy Flavoring – 1/2 teaspoon, creates that nostalgic essence; make sure it’s gluten-free if needed.
- Whipped Topping – 1/4 cup, lightens the filling; a vegan option is great for dairy-free lovers.
- Heavy Cream – 2 tablespoons, enhances creaminess; milk can lighten it if desired.
For the Outer Shell
- Refrigerated Biscuit Dough – 1 package (8 count), ensures a crispy texture; homemade dough is a delightful alternative.
- All-Purpose Flour – 2 tablespoons, dust your surface to keep everything from sticking; gluten-free flour suits those with dietary restrictions.
For Frying and Coating
- Vegetable Oil – 4 cups, required for frying to achieve that perfect crisp; canola oil is a suitable substitute.
- Granulated Sugar – 1 cup, used to roll the fried bombs in after cooking; coconut sugar can add a unique twist.
- Powdered Sugar – for dusting, adds to the visual appeal and sweetness.
- Cotton Candy – for topping, adds whimsical flair; fresh cotton candy will make these bombs truly festive.
These Cotton Candy Cheesecake Bombs can easily become a hit at your next gathering, inviting creativity with each delectable bite!
Step‑by‑Step Instructions for Crispy Cotton Candy Cheesecake Bombs
Step 1: Prepare the Cheesecake Filling
In a medium mixing bowl, blend 1 cup of softened cream cheese until smooth and creamy. Gradually add in 1/2 cup powdered sugar, 1 teaspoon vanilla extract, and 1/2 teaspoon cotton candy flavoring, mixing thoroughly. Gently fold in 1/4 cup whipped topping and 2 tablespoons heavy cream until everything is well combined. Refrigerate the mixture for about 30 minutes to help it firm up before wrapping.
Step 2: Roll Out the Biscuit Dough
On a clean, floured surface, take your refrigerated biscuit dough and use a rolling pin to flatten each round to about 1/8 inch thick. This will form the outer shell of your Crispy Cotton Candy Cheesecake Bombs. As you work, keep a light dusting of flour to prevent sticking, ensuring an even texture for each biscuit round.
Step 3: Fill and Seal the Bombs
Scoop 1-2 tablespoons of the refrigerated cheesecake filling and roll it into a small ball. Place the ball in the center of each flattened biscuit round, then carefully fold the edges over to seal the filling completely. Roll the filled biscuit between your hands to create a smooth outer shell, ensuring no cracks remain.
Step 4: Heat the Oil
In a heavy-bottomed pot, pour in 4 cups of vegetable oil and heat it to 350°F. Use a thermometer to monitor the temperature accurately. Once the oil is hot enough, it should shimmer and appear active, indicating it’s ready for frying your crispy cheesecake bombs.
Step 5: Fry the Cheesecake Bombs
Carefully lower the filled and sealed bombs into the hot oil in small batches, ensuring not to overcrowd the pot. Fry for 1-2 minutes on each side until they are a beautiful golden brown color. Use a slotted spoon to gently turn them, watching for that mesmerizing crispiness to develop.
Step 6: Sugar Coat the Bombs
Once your Crispy Cotton Candy Cheesecake Bombs are fried, remove them and place them on paper towels to drain any excess oil. While still warm, roll the bombs in granulated sugar for a lovely sweet coating. For a fun twist, mix in a bit of cotton candy flavoring with the sugar for added taste.
Step 7: Finish and Serve
Dust the warm cheesecake bombs lightly with powdered sugar before adding a whimsical touch—top each one with fluffy cotton candy. These delightful treats are best served immediately while warm, so gather your guests and enjoy the magic of your homemade Cotton Candy Cheesecake Bombs!
Make Ahead Options
These Crispy Cotton Candy Cheesecake Bombs are perfect for busy home cooks looking to save time on dessert preparation! You can make the cheesecake filling up to 24 hours in advance—just blend all the filling ingredients and refrigerate it in an airtight container. The biscuit dough can also be prepped ahead, flattened into rounds, and stored in the fridge for up to 3 days. When you’re ready to serve, fill the rounds with the chilled filling, seal them, and fry them fresh for that irresistible crispy exterior. This way, you’ll have warm, luscious desserts ready to wow your guests with minimal evening effort!
How to Store and Freeze Cotton Candy Cheesecake Bombs
Fridge: Store leftover cheesecake bombs in an airtight container for up to 3 days. They are best enjoyed fresh but can be refrigerated to maintain flavor.
Freezer: For longer storage, freeze the bombs before frying. Wrap them individually in plastic wrap or keep in an airtight container for up to 2 months. Fry straight from the freezer, adding an extra minute to the cooking time.
Reheating: If storing in the fridge, reheat in the oven at 350°F for about 5-7 minutes to restore crispiness. Avoid the microwave to prevent sogginess.
Serving: For best taste and texture, enjoy these Cotton Candy Cheesecake Bombs warm and fresh out of the fryer.
What to Serve with Crispy Cotton Candy Cheesecake Bombs
Indulge in a whimsical feast by pairing these delightful bites with complementary sides and desserts that heighten their sweet magic.
-
Chocoholic’s Dream: Rich, fudgy brownies provide a decadent contrast to the lightness of the cheesecake bombs. Their dense texture and chocolate flavor will satisfy any sweet tooth.
-
Fruit Salad Medley: A refreshing mix of seasonal fruits adds a burst of brightness. The natural sweetness and acidity lighten the meal, creating balance with the creamy bombs.
-
Homemade Ice Cream Sundae: Top scoops of vanilla or cotton candy ice cream with warm cheesecake bombs for a dreamy dessert. The warm and cold textures make this a show-stopping delight.
-
Light Lemonade: A glass of freshly squeezed lemonade strikes a perfect balance with the sweetness of the bombs, offering a zesty and refreshing sip to cleanse your palate.
-
Chocolate Dipping Sauce: Serve with a warm, melted chocolate dip for an extra layer of indulgence. The combination of crispy, creamy, and chocolaty makes for a heavenly experience.
-
Cotton Candy Lattes: Delight your guests with whimsical cotton candy lattes. The fluffy sweetness echoing the dessert will bring smiles and make the moment truly special.
-
Caramel Popcorn: This crunchy treat adds a fun texture to your spread. The sweet and salty notes will enhance the richness of the cheesecake bombs while keeping everyone coming back for more.
-
Sparkling Fruit Punch: An effervescent fruit punch adds a celebratory vibe to your gathering. Its sweet and fizzy nature pairs beautifully with the airy dessert, making it a feast for the senses.
Expert Tips for Crispy Cotton Candy Cheesecake Bombs
-
Freshness First: Enjoy the Cotton Candy Cheesecake Bombs immediately after frying for the ultimate crispy texture. They can lose their crunch if stored too long.
-
Temperature Tactics: Always maintain the frying oil at 350°F. This ensures even cooking and prevents the filling from becoming greasy.
-
Filling Prep: Make the cheesecake filling a day ahead. This saves time and allows the flavors to meld beautifully; just store it covered in the fridge!
-
Sealing Seams: Be sure to thoroughly seal the edges of the biscuits. Cracks can lead to filling leakage during frying, ruining the delightful surprise inside.
-
Creative Coatings: Experiment with different sugar coatings! Mixing a bit of flavoring in your granulated sugar adds an exciting twist to the taste profile of these whimsical treats.
-
Perfect Portioning: Use a cookie scoop for even filling amounts, ensuring each Cotton Candy Cheesecake Bomb is consistently delicious and perfectly stuffed.
Cotton Candy Cheesecake Bombs Variations
Now let your creativity take flight and customize these delightful cheesecake bombs to your liking!
- Dairy-Free: Substitute cream cheese with a vegan cream cheese alternative and use coconut whipped topping for a creamy finish.
- Gluten-Free: Opt for gluten-free biscuit dough and flour to ensure these whimsical treats suit your dietary needs.
- Fruity Twist: Replace cotton candy flavoring with strawberry or raspberry extract for a fruity explosion of flavor.
- Chocolate Coating: Dip the bombs in melted chocolate after frying for a luscious chocolatey outer layer that complements the cheesecake filling.
- Spiced Sugar: Mix cinnamon or nutmeg with your granulated sugar for a warm, spiced surprise that adds a seasonal touch.
- Candied Toppings: Top with crushed candies like M&Ms or crushed peppermint for added crunch and color—perfect for festive occasions.
- Nutty Crunch: Coat the bombs in finely chopped nuts before frying for a delightful crunch and additional flavor.
- Dessert Platter: Serve alongside my Pumpkin Cheesecake Truffles to create a stunning dessert platter that’s sure to wow your guests!
Explore these variations to elevate your Cotton Candy Cheesecake Bombs and make every batch a unique treat!
Cotton Candy Cheesecake Bombs Recipe FAQs
How do I select ripe ingredients for this recipe?
Absolutely! When picking cream cheese, look for a brand that has a smooth texture and no lumps. It should be at room temperature for easy blending. For the powdered sugar, ensure it’s fresh and free from clumps. If you’re using fresh cotton candy, choose fluffy, colorful pieces that haven’t started to deflate or lose shape.
How should I store leftover cheesecake bombs?
Very! To keep your leftover Cotton Candy Cheesecake Bombs fresh, place them in an airtight container and store them in the fridge for up to 3 days. However, they are best enjoyed right after frying for the ultimate crispy experience. If you notice any sogginess, reheating in an oven at 350°F for about 5-7 minutes will help restore some crispiness.
Can I freeze Cotton Candy Cheesecake Bombs?
Absolutely! If you want to store these delightful treats for a longer period, freeze them before frying. Wrap each bomb tightly in plastic wrap or place them in an airtight container. They’ll maintain their quality in the freezer for up to 2 months. When you’re ready to enjoy them, fry them straight from the freezer—just add an extra minute to the cooking time to ensure they’re thoroughly heated.
What if my cheesecake filling is too runny?
Ah, no worries! If you find your filling is too runny, you can incorporate a bit more powdered sugar to thicken it up—start with a tablespoon and mix until reaching your desired consistency. Alternatively, chilling the mixture for an additional 15-30 minutes can help firm it up for easier handling when filling your bombs.
Are there any dietary considerations I should be aware of?
Yes! If you or your guests have dietary restrictions, you can modify this recipe accordingly. Use a vegan whipped topping and dairy-free cream cheese to make it dairy-free. If you’re concerned about gluten, opt for gluten-free biscuit dough and flour options. Always check flavoring ingredients for allergens, especially if using flavored extracts or cotton candy.
How can I make these healthier?
The more the merrier! You can reduce the sugar by using less granulated sugar for coating, or try using a blend of coconut sugar for a healthier option. Consider baking the bombs instead of frying, brushing them lightly with oil before baking at 350°F until golden brown—this will yield a different texture but still offer a delicious treat!
Crispy Cotton Candy Cheesecake Bombs for Sweet Nostalgia
Ingredients
Equipment
Method
- In a medium mixing bowl, blend 1 cup of softened cream cheese until smooth and creamy. Gradually add in 1/2 cup powdered sugar, 1 teaspoon vanilla extract, and 1/2 teaspoon cotton candy flavoring, mixing thoroughly. Gently fold in 1/4 cup whipped topping and 2 tablespoons heavy cream until everything is well combined. Refrigerate the mixture for about 30 minutes to help it firm up before wrapping.
- On a clean, floured surface, take your refrigerated biscuit dough and use a rolling pin to flatten each round to about 1/8 inch thick. This will form the outer shell of your Crispy Cotton Candy Cheesecake Bombs. As you work, keep a light dusting of flour to prevent sticking, ensuring an even texture for each biscuit round.
- Scoop 1-2 tablespoons of the refrigerated cheesecake filling and roll it into a small ball. Place the ball in the center of each flattened biscuit round, then carefully fold the edges over to seal the filling completely. Roll the filled biscuit between your hands to create a smooth outer shell, ensuring no cracks remain.
- In a heavy-bottomed pot, pour in 4 cups of vegetable oil and heat it to 350°F. Use a thermometer to monitor the temperature accurately. Once the oil is hot enough, it should shimmer and appear active, indicating it's ready for frying your crispy cheesecake bombs.
- Carefully lower the filled and sealed bombs into the hot oil in small batches, ensuring not to overcrowd the pot. Fry for 1-2 minutes on each side until they are a beautiful golden brown color. Use a slotted spoon to gently turn them, watching for that mesmerizing crispiness to develop.
- Once your Crispy Cotton Candy Cheesecake Bombs are fried, remove them and place them on paper towels to drain any excess oil. While still warm, roll the bombs in granulated sugar for a lovely sweet coating. For a fun twist, mix in a bit of cotton candy flavoring with the sugar for added taste.
- Dust the warm cheesecake bombs lightly with powdered sugar before adding a whimsical touch—top each one with fluffy cotton candy. These delightful treats are best served immediately while warm, so gather your guests and enjoy the magic of your homemade Cotton Candy Cheesecake Bombs!
Leave a Reply